This Salad Is a Show-Off (and I'm Okay with That)
Some salads are meant to be side pieces. This one? She's center stage, bathed in golden garlic oil and absolutely not playing it cool. This seasonal beet & kumquat salad's here to stay.
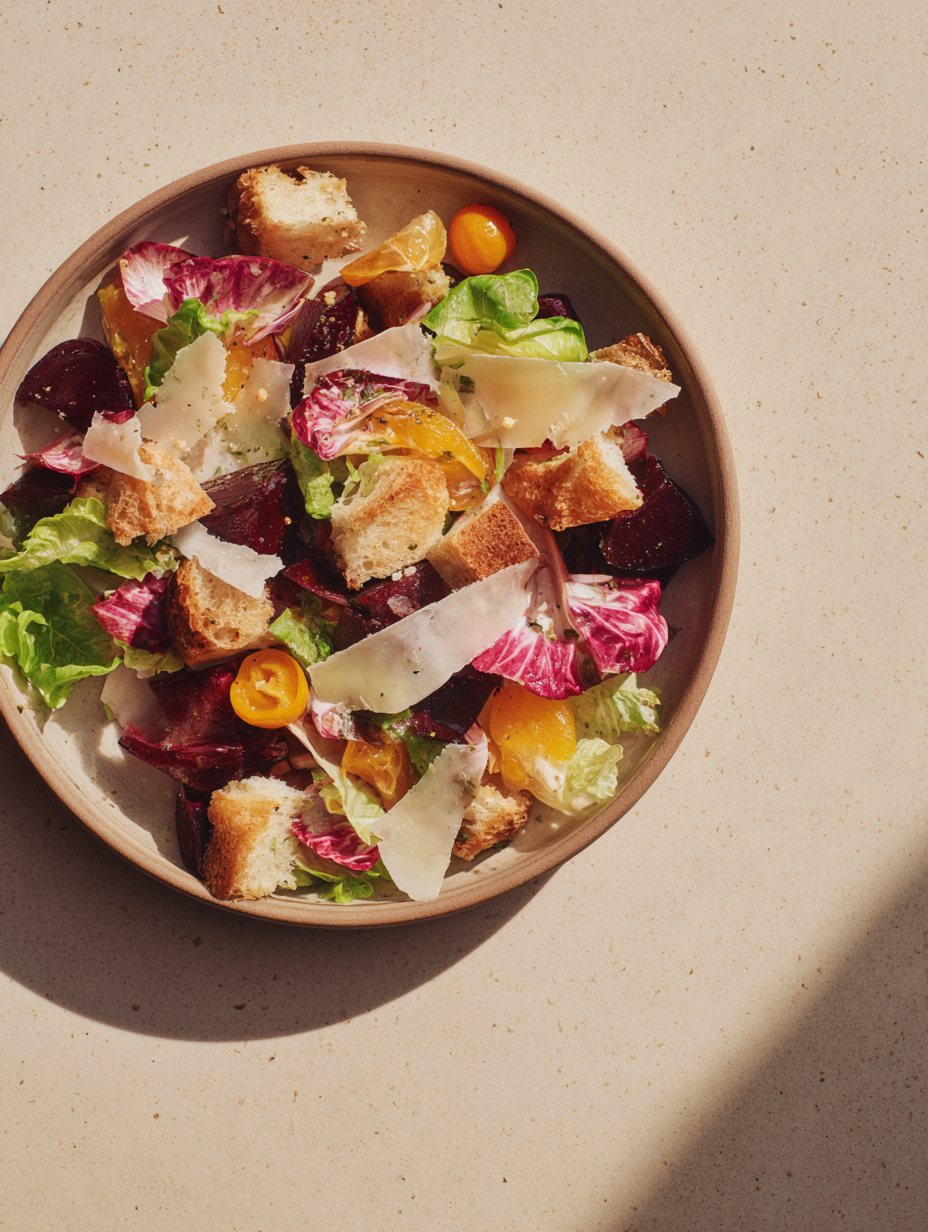
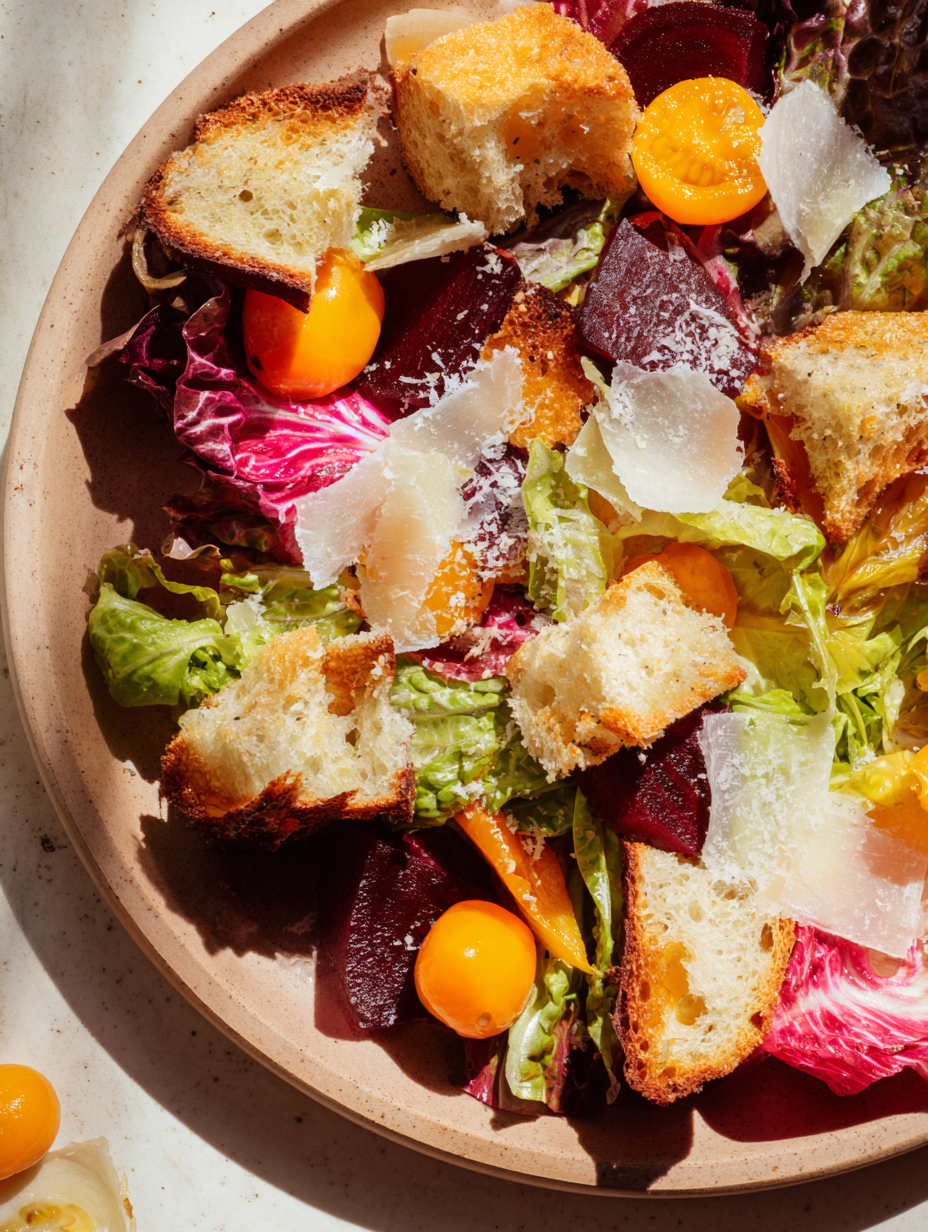
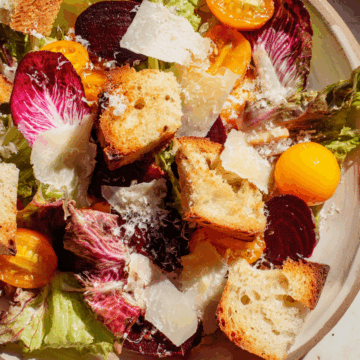
Let's just take a second to appreciate what's going on here: juicy roasted beets confited in garlic until they're basically edible velvet, crisp butter lettuce and torn radicchio doing their color-blocking thing, creamy curls of Tomme cheese (more on that mysterious beauty in a minute), and poppable kumquats bringing juicy little explosions of citrus drama.
Then there's the dressing-creamy, lemony, garlicky magic-made from the same confit oil the beets were bathed in. And because we're grown-ups who know better, we're not skipping the focaccia croutons.
Honestly, it's almost too pretty to eat. Almost.
But you should, because all that color? It comes with flavor. And if you follow the method (yes, we toss the greens before the dressing because we respect lettuce around here), you're looking at a spring salad that's bold, balanced, and kind of a show-off-in the best way.
This seasonal beet & kumquat salad was born out of a serious flavor memory-one I can't stop thinking about. I had a dish at Husk in Nashville that completely reset how I think about pairing roots, dairy, and citrus. It featured roasted beets nestled into a swoop of tangy Greek yogurt, topped with buttery biscuit chips (yes, really), lavender, lemon zest, and creamy Tomme cheese. It was earthy, bright, floral, and rich all at once-unexpected, but in that genius way that makes you jealous you didn't come up with it first. This salad isn't a copy, but it carries that same spirit: bold contrasts, fresh seasonal ingredients, and enough creamy-crunchy-tangy action to keep every bite interesting.
Why It's on Repeat
This salad has officially earned its spot in my weekly dinner rotation-and not just because it's pretty (though, let's be honest, she's stunning). It hits all the marks: fresh, balanced, easy to prep ahead, and wildly satisfying without feeling heavy. I've been serving it alongside a simply seared salmon filet-crispy skin, medium-rare center-and the combo sings. The richness of the fish plays off the citrus and garlic, while the cheese and croutons give it just enough heft to hold its own as a main dish. It's one of those meals that feels kind of fancy… but takes almost no effort once your components are ready.
A Chef's Trick: Keep That Dressing Creamy
If you want your creamy garlic dressing to stay silky and emulsified (instead of breaking after ten minutes in the fridge), add a pinch-seriously, a tiny pinch-of xanthan gum while blending. It acts like culinary glue, keeping the oil and acid bonded without changing the flavor. You'll find it at most specialty or health food stores, or online. A little goes a long way, and it makes a huge difference for that restaurant-level consistency at home.
[feast_advanced_jump_to]Ingredients

For the Garlic Confit Beets
- 2 medium red beets, scrubbed (no need to peel)
- 6-8 garlic cloves, peeled
- extra virgin olive oil (enough to cover)
- diamond crystal kosher salt
Note: No peeling required up front. Once the beets are confited and cooled, the skins will slide right off with a gentle rub using a paper towel. Less mess, more flavor, and that deep roasted color stays intact.
Okay, chef… WTF is a Tomme?
So you're halfway through reading this recipe and thinking,
"Okay… beets, kumquats, garlic confit... I'm with you.
But Tomme cheese? What even is that and where do I find it-between the Kraft Singles and the shredded cheddar at Kroger?"
Valid question. Here's the scoop:
Tomme (pronounced tuhm, like you're trying to say "tummy" with a French accent but gave up halfway) is a rustic, semi-firm cow's milk cheese that's buttery, earthy, and just funky enough to be interesting. It's not stinky, it's not gooey, it's the cheese equivalent of wearing linen pants and knowing how to pair wine with snacks-casual but effortlessly cool.
The kind I use? Thomasville Tomme from Sweet Grass Dairy in Georgia. It's made with raw cow's milk, aged just enough to develop flavor but still slice and shave like a dream. Think of it as a Southern riff on an Alpine classic.
And no, I don't get a commission or affiliate cut-I just genuinely love what this local, family-run creamery is doing. Supporting small dairies means more good cheese in the world and fewer sad plastic bricks in your fridge. Everyone wins.
Where to buy it:
- Check your local specialty cheese shop or co-op
- Order directly from Sweet Grass Dairy online
- At the grocery store, look in the fancy cheese section-you know the one with the weird rinds and tiny wheels that cost more than your gym membership.
Home cook hack: If you can't find Tomme, go with a young Manchego, mild Gruyère, or even a creamy Havarti in a pinch. You want something sliceable with a buttery finish that won't fight the citrus or garlic.
Now go forth, and cheese like you mean it.
For the Creamy Garlic Dressing
- all confit garlic cloves from recipe (6-8 cloves)
- 9 tablespoon (just over ½ cup) garlic confit oil
- juice of 3 whole lemons (about 6 tablespoon total) - reserve the zest to finish the salad
- 1 tablespoon whole grain dijon mustard
- 1 tablespoon local raw honey, or more to taste
- pinch, of xanthan gum (optional, to emulsify and stabilize)
- diamond crystal kosher salt and freshly cracked black pepper, to taste
- splash of water, as needed for consistency
Olive Oil Matters (but not all oils do the same job)
When you're confiting the beets and garlic, use a decent-but not precious-extra virgin olive oil. You want good flavor and stability, but don't waste the fancy stuff on a 75-minute bake. Save your good EVOO for the final seasoning and dressing drizzle.
For finishing, I love Laudemio Fattoria San Michele a Torri-it's grassy, punchy, and absolutely sings with lemon and greens. You can find it online (yes, even on Amazon). I don't get a commission-I just like shouting out great olive oil when I taste it.
For the Salad
- 1 head butter lettuce, leaves torn
- 1 small head pink radicchio, leaves torn (not shredded)
- ¼ cup kumquats, halved
- 2 oz tomme cheese, shaved or grated
- 1 cup focaccia croutons (see method below)
- fresh lemon zest
- cracked black pepper
- diamond crystal kosher salt
- fine extra olive oil
- wine vinegar
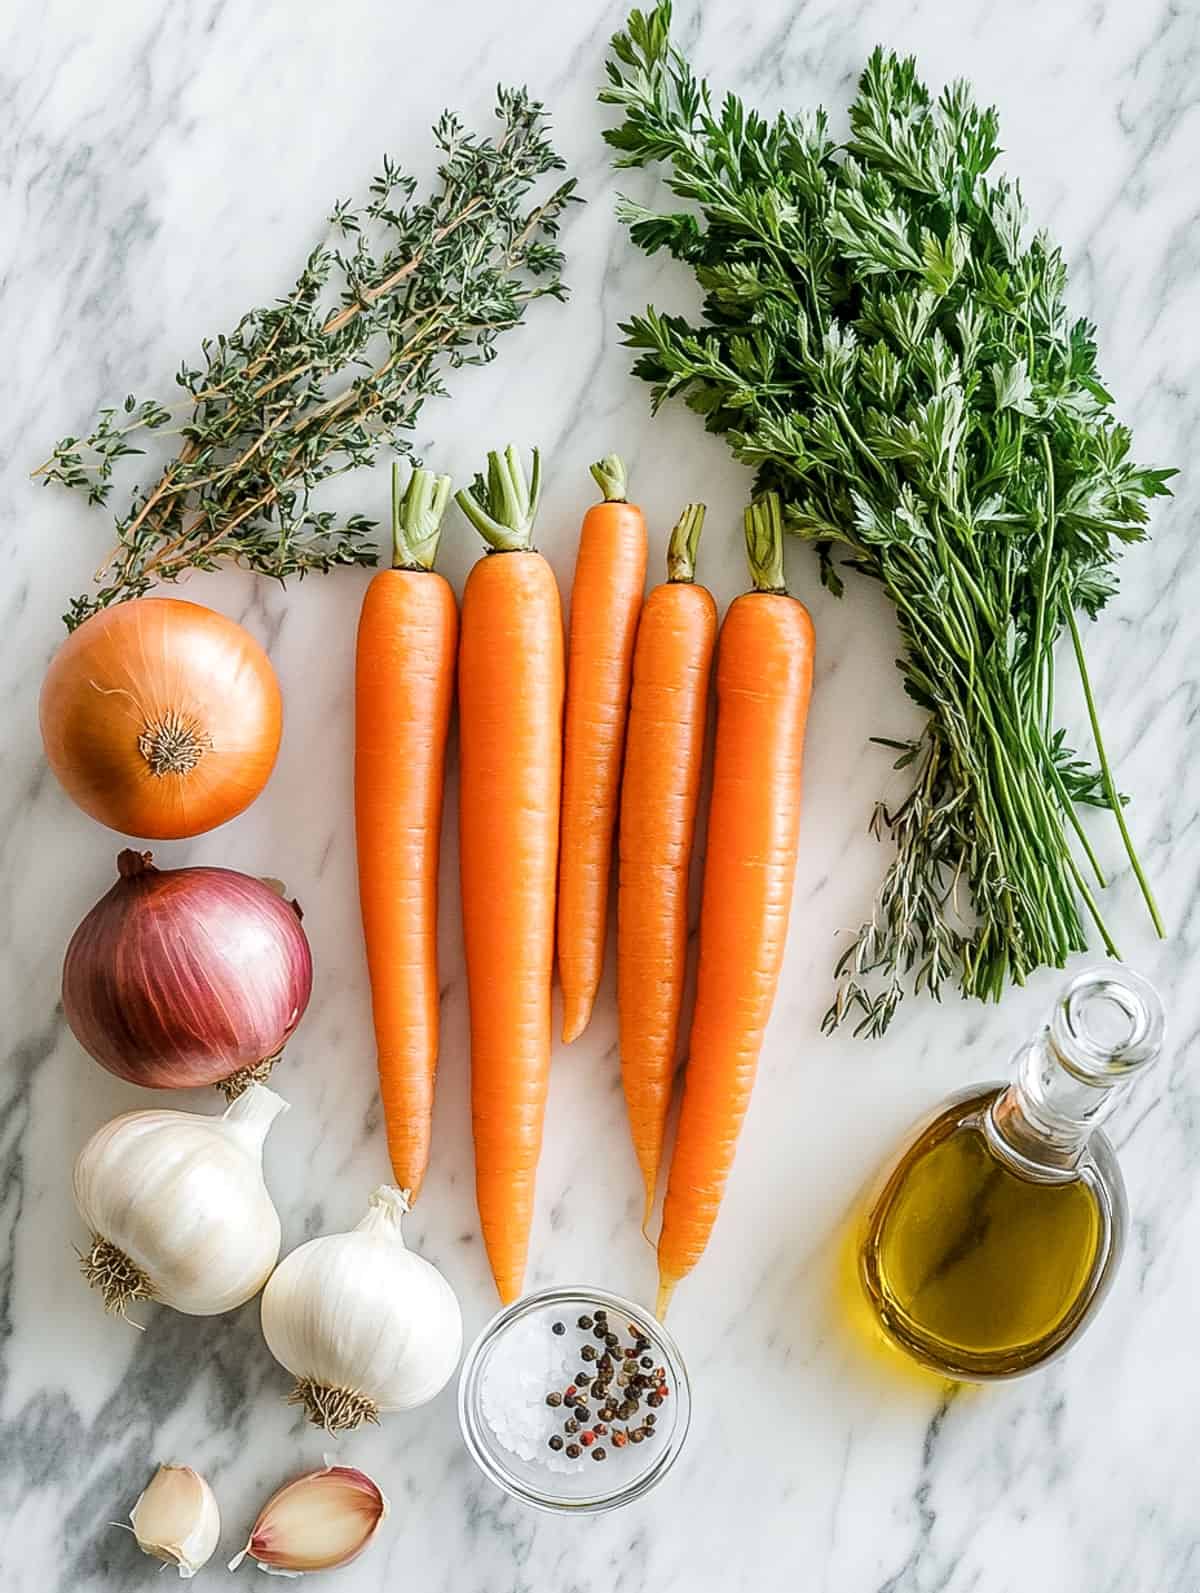
Market‑Fresh Prep Notes
Beets: Pick firm, fresh beets without soft spots. Scrub under cold water.
Lettuce & Radicchio: Soak whole leaves in cold water to remove grit. Lift gently, spin or pat dry. If the radicchio tastes overly bitter, a brief ice‑water soak (10 minutes) can mellow it without dulling the color.
Kumquats: Slice each in half-big enough to be bold, small enough to keep bite balanced. Rinse first and remove seeds.
Instructions
Make the Garlic Confit Beets
Place whole, scrubbed beets and garlic cloves in a small saucepan. Cover with salt and enough medium-quality extra virgin olive oil to submerge.
Set over low heat and cook uncovered for 60-75 minutes, maintaining a gentle bubble-think lazy champagne fizz, not a fry. Turn the beets occasionally for even cooking.
Once tender and garlic is golden, remove from heat and let cool in the oil. Rub skins off the beets with a paper towel, then quarter them just before plating.
Chef's Note: Stovetop confit gives you real-time control-no preheating, no hot kitchen, and you can smell when it's getting good. Just watch the heat-too high and you're frying, not confiting.
How to Confit - Yes, It's a Verb
Confit (pronounced con-FEE) is a fancy French word for "cook something low and slow in fat until it becomes magic." Traditionally it's done with duck, but garlic and beets are absolute show-offs when treated the same way.
Here, we submerge whole beets and peeled garlic cloves in olive oil and let them roast gently in the oven until soft, jammy, and ridiculously flavorful. No browning, no boiling-just a slow bath in oil that transforms simple produce into something luxurious.
It's not deep frying and it's not roasting. It's confit. And once you do it, you'll want to confit everything.
Make the Croutons
Preheat oven to 375°F. Cut stale focaccia into 1-inch cubes. Toss with extra virgin olive oil and a pinch of salt.
Spread on a sheet tray and bake for 12-15 minutes, until golden.
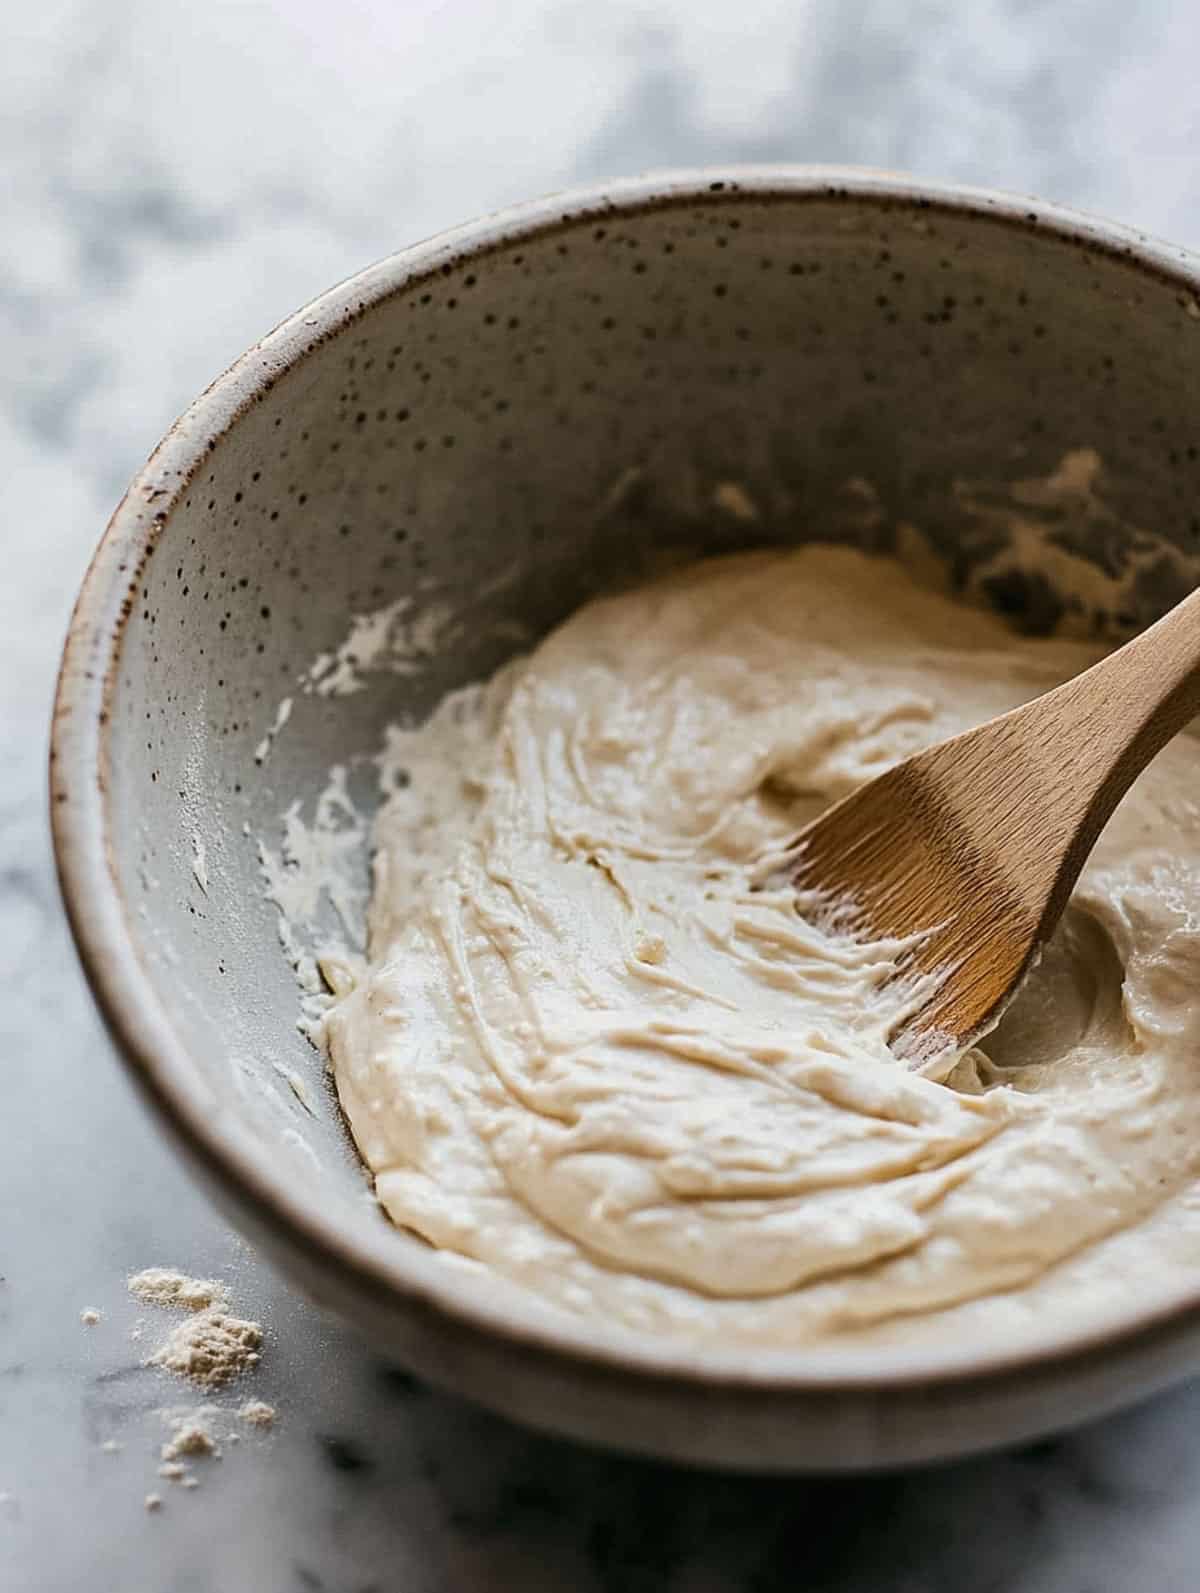
Blend the Dressing
In a blender, combine all confit garlic cloves, confit oil, juice of 3 lemons, 1 tablespoon whole grain Dijon, 1 tablespoon local raw honey, and a pinch of xanthan gum (optional).
Blend until creamy. Taste. Season with salt and black pepper. Taste again. Add a splash of water to loosen if needed. If you want it more acidic add more lemon, a little sweeter add more honey. This is your dressing, make it how you like it.
Assemble the Salad
In a large bowl, toss torn butter lettuce and torn radicchio with your best extra virgin olive oil, a splash of wine vinegar, pinch of salt, and black pepper.
Add halved kumquats and toss again. Spoon in just enough dressing to coat-don't overdress.
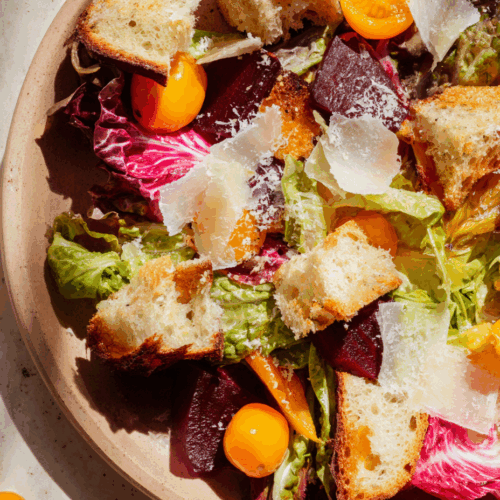
Plate the greens. Top with quartered confit beets, shave the tomme right on top (if you don't have a cheese slicer, because who does really, you can use a y-peeler for this), and add the focaccia croutons. Finish with lemon zest-and some more cheese if you're me.
Substitutions
Look, we love a very specific ingredient list-but real life calls for flexibility. Here's how to swap without losing the magic:
Xanthan gum: Optional, but if you don't have it and your dressing breaks, just give it a quick shake before serving. Or embrace the rustic life.
Tomme cheese: Can't find it? Try a Manchego or mild Gruyère. You want something sliceable, buttery, and just funky enough to stand up to citrus and garlic.
Kumquats: Out of season? Use supremed Meyer lemons or paper-thin slices of orange peel. Quick-pickled shallots also bring a bright, acidic bite in a pinch.
Butter lettuce: Little Gem, Bibb, or even a tender mix of baby greens will work-just avoid anything too tough or too peppery (looking at you, arugula).
Radicchio: Treviso or Castelfranco if you can find them, otherwise swap in endive or even a small handful of red cabbage for color and crunch. If your radicchio is extra bitter, a quick ice bath helps take the edge off.
Focaccia croutons: Day-old sourdough or ciabatta does the trick. Just keep the cubes big and bake until golden with a chewy center.
Confit oil: If you didn't save the oil (first, why?), a good mild olive oil will work for the dressing. Just know the flavor won't be as layered.
Variations
This seasonal beet & kumquat salad's got range. If you've made it once and want to mix things up without reinventing the wheel, here's how to play:
- Add protein: Top it with seared salmon (my go-to), grilled chicken thighs, or even a soft-boiled egg. The richness balances beautifully with the citrus and bitter greens.
- Swap the greens: Sub the butter lettuce and radicchio for peppery watercress, frisée, or a mix of tender spring greens for something a little wilder.
- Change the cheese vibe: Go tangy with a spoonful of whipped goat cheese or creamy burrata under the greens. Or shave parmesan over the top for a saltier punch.
- Make it heartier: Toss in some farro or lentils for a salad that eats like a meal. Bonus points if you drizzle the dressing while everything's still warm.
- Lean into the citrus: Add blood orange or cara cara segments for a sweeter, juicier finish. Even better if you've got fennel to slice in alongside.
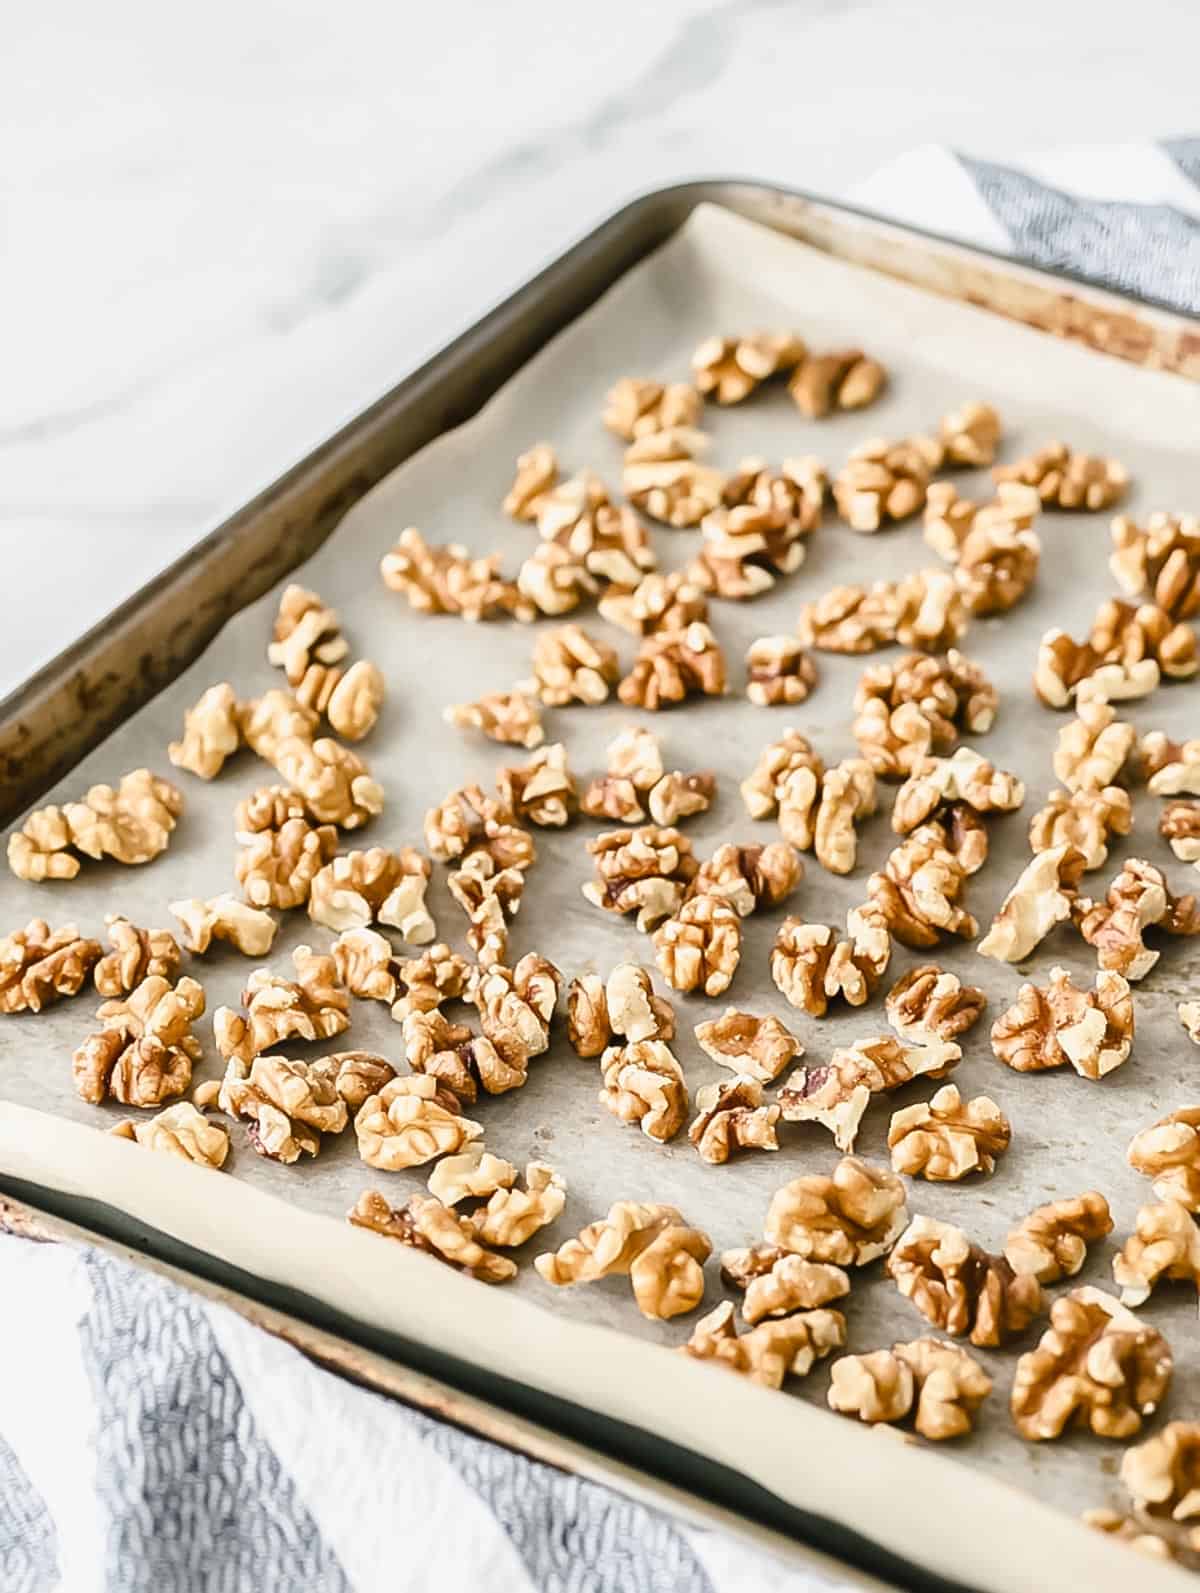
- Toast it up: Add roasted nuts (hazelnuts, pistachios, or almonds) for an extra layer of crunch and richness. Toast them in a dry pan to wake them up.
This isn't a fragile little side salad. It's built to flex with the season-and with whatever's rolling around in your fridge.
Equipment
You don't need a fancy setup-just a few solid tools to get this salad from market haul to plated perfection:
Microplane or zester - To finish with that final lemony flourish
Small heavy-bottomed saucepan - For stovetop garlic and beet confit (don't skimp-thin pans scorch oil)
Tongs or slotted spoon - For safely fishing out beets and garlic from hot oil
Paper towels - To rub the skins off those tender, confit beets like a pro
Fine mesh strainer - For saving and reusing that dreamy garlic oil
Blender or immersion blender - To whip your dressing into creamy magic
Large mixing bowl - Essential for tossing greens without bruising
Salad spinner or clean kitchen towel - Because wet lettuce is the enemy of flavor
Y-peeler or cheese plane - For shaving Tomme into buttery little curls
Sharp knife + sturdy cutting board - Always non-negotiable
Sheet pan - For baking up golden focaccia croutons
Storage
This seasonal beet & kumquat salad was created to highlight seasonal ingredients at their best, and its best when it's fresh-like, just-dressed-and-plated fresh. The citrus pops brighter, the greens stay crisp, and the cheese melts into that dreamy dressing just so. That said? I get busy too. Here's how to prep smart and keep it tasting like it was made ten minutes ago.
What to Store (and How):
- Greens (lettuce + radicchio): Wash, dry thoroughly (like, spin it 'til you're dizzy), and store in a sealed container lined with paper towels. Keeps 2-3 days.
- Beets + garlic confit: Store in a jar submerged in the confit oil. Refrigerate up to 1 week. Let come to room temp before plating for best texture and flavor.
- Dressing: Store in a jar in the fridge for up to 1 week. Shake well before using-unless you added xanthan gum, in which case it'll stay perfectly emulsified like the little overachiever it is.
- Croutons: Let them cool completely, then store in an airtight container at room temp for 2-3 days. Re-toast if needed for crunch (I don't use an airfryer often, but it works great for this).
Bottom line: Fresh is best. But prepped well, this salad can absolutely work on your time.
Top Tip
Season your greens before the dressing hits the bowl.
It's the chef move that most home cooks skip-but it changes everything. A drizzle of good olive oil, a splash of mild vinegar, a hit of salt and cracked black pepper-then you toss. This base layer wakes up the greens and gives the dressing something to hold onto.
FAQ
Not if you want it to look and taste fresh. But you can prep all the components in advance-see the storage tips above. Assemble and dress right before serving for the best texture and flavor.
Nope-but don't just grab any random cheese. You want something buttery, semi-firm, and mild enough not to fight the kumquats. Think young Manchego, Fontina, or even a mellow Gruyère.
They're seasonal, so it happens. Try supremed Meyer lemons or thin slices of orange peel. Quick-pickled shallots can add a similar acidic pop.
Absolutely. It just helps the dressing stay creamy instead of separating. No big deal-just give it a good shake before each use.
Sure, but you'll lose that silky, olive oil-rich texture that makes this salad special. Roasting works in a pinch-but if you have the time, confit is worth it.
It can be! Just use GF bread for your croutons-or skip them and add toasted nuts for crunch.
Yes. Skip the cheese and use agave in place of the honey. You'll miss the creamy richness, but the garlic, citrus, and beets still bring it.
Pair It With: The Olio
This salad's got citrus, creaminess, and a little earthy drama-which means it begs for something crisp, botanical, and just a bit silky. Enter: The Olio-my olive oil-washed gin sour.
The gin's herbal backbone plays off the kumquats and bitter greens, the lemon echoes the dressing, and the olive oil wash adds this subtle, rounded mouthfeel that mirrors the confit richness in the beets. It's bright but balanced, with enough intrigue to hold up against a salad that's showing off.
Want to sip alongside? Here's how to make The Olio-a cocktail with clean lines, soft edges, and a vibe that says "I eat seasonal."
Related
Looking for other recipes like this? Try these:


Pairing
These are my favorite dishes to serve with this Garlic Confit Beet Salad with Kumquats, Butter Lettuce & Tomme:
Seasonal Beet & Kumquat Salad With Creamy Lemon‑Garlic Dressing
Equipment
- small saucepan
- tongs or slotted spoon
- paper towels
- fine mesh strainer
- blender
- large mixing bowl
- cheese plane (or y-peeler)
- sharp kniife
- cutting board
- sheet pan
- zester
Ingredients
Garlic Confit Beets
- 2 ea mediium red beets whole and scrubbed
- 6-8 ea garlic cloves peeled
- Diamond Crystal kosher salt to taste
- medium-quality extra virgin olive oi enough to submerge
Croutons
- 1 ea focaccia cut into 1-inch cubes
- Olive oil for tossing
- Diamond Crystal kosher salt to taste
Creamy Garlic Dressing
- All confit garlic cloves from recipe 6-8 cloves
- 9 tablespoon garlic confit oil
- Juice of 3 lemons zest reserved for salad finish
- 1 tablespoon whole grain Dijon mustard
- 1 tablespoon local raw honey
- ⅛ teaspoon xanthan gum optional
- Diamond Crystal kosher salt to taste
- Freshly cracked black pepper to taste
- Splash of water if needed to thin
Salad
- 1 head butter lettuce torn
- 1 small head radicchio torn
- ¼ cup kumquats halved and seeded
- 2 oz tomme chees shaved
- cracked black pepper to finish
- Reserved lemon zest for garnish
For Tossing Greens
- High-quality extra virgin olive oil such as Laudemio
- Mild vinegar white wine or champagne
- Diamond Crystal kosher salt
- Cracked black pepper
Instructions
- Place whole, scrubbed beets and garlic cloves in a small saucepan. Cover with salt and enough medium-quality extra virgin olive oil to submerge.
- Set over low heat and cook uncovered for 60-75 minutes, maintaining a gentle bubble-think lazy champagne fizz, not a fry. Turn the beets occasionally for even cooking.
- Once tender and garlic is golden, remove from heat and let cool in the oil. Rub skins off the beets with a paper towel, then quarter them just before plating.
- Preheat oven to 375°F. Cut stale focaccia into 1-inch cubes. Toss with extra virgin olive oil and a pinch of salt.
- Spread on a sheet tray and bake for 12-15 minutes, until golden.
- In a blender, combine all confit garlic cloves, confit oil, juice of 3 lemons, 1 tablespoon whole grain Dijon, 1 tablespoon local raw honey, and a pinch of xanthan gum (optional).
- Blend until creamy. Taste. Season with salt and black pepper. Taste again. Add a splash of water to loosen if needed. Adjust lemon or honey to your liking.
- In a large bowl, toss torn butter lettuce and torn radicchio with your best extra virgin olive oil, a splash of wine vinegar, pinch of salt, and black pepper.
- Add halved kumquats and toss again. Spoon in just enough dressing to coat-don't overdress.
- Plate the greens. Top with quartered confit beets, shave the tomme right on top (use a cheese plane or a Y-peeler), and add the focaccia croutons.
- Finish with lemon zest-and more cheese, if you're me.